How to Submit a Sitemap to Google (in 4 Simple Steps)

Google plays a crucial role in helping users discover relevant content.
To ensure that your website is properly indexed and easily accessible to users, it’s important to provide the Google search engine with a roadmap of your site’s structure.
This is achieved with the help of sitemaps.
A sitemap typically organizes all the pages on your website so that search engines crawlers can easily navigate it and understand its structure more efficiently.
Learn about submitting a sitemap to Google in four simple steps, ensuring your website receives optimal visibility in search results.
See the comprehensive sitemap guide for beginners to get detailed information about website sitemaps and their benefits.
What Is a Sitemap?
A sitemap is a file that lists and provides information about the pages, content, and structure of a website.
It serves as a blueprint or guide for search engines to crawl and index the website more effectively.
A sitemap is typically an XML file, although other formats such as HTML are also used.
What is Google Search Console?
Google Search Console (formerly known as Google Webmaster Tools) is a free web service provided by Google that allows website owners, webmasters, and SEO professionals to monitor and manage the presence and performance of their website in Google’s search results.
It offers a range of tools and reports that provide valuable insights into how Google perceives and interacts with a website.
It provides actionable insights, helps diagnose issues, and enables webmasters to communicate with Google to improve the visibility and accessibility of their websites.
Why Do You Need to Submit a Sitemap on Google Search Console?
Submitting a sitemap on Google Search Console is important because it helps search engines discover and understand the structure and content of your website more effectively.
By submitting a sitemap, you provide Google with a comprehensive list of URLs on your site and additional metadata about each page.
This allows Google’s crawlers to navigate and index your website’s pages more efficiently, ensuring that no important content is missed.
It also helps Google prioritize crawling and indexing updates to your site, especially for new or recently changed pages.
Steps to Submit a Sitemap Using Google Search Console-
Submitting sitemaps to Google is a seamless process using Google Search Console.
Here’s a step-by-step guide-
Step 1: Log in to Google Search Console.
Start by logging in to your Google Search Console account.
If you don’t have an account, you can create one by visiting the Google Search Console website and following the registration process.
Using the same Google account associated with your website or business is recommended.
Step 2: Select the website to add a sitemap.
On the Google Search Console dashboard, select the website URL for which you want to add the sitemap.
(This step is required if you use one account for more than one property).
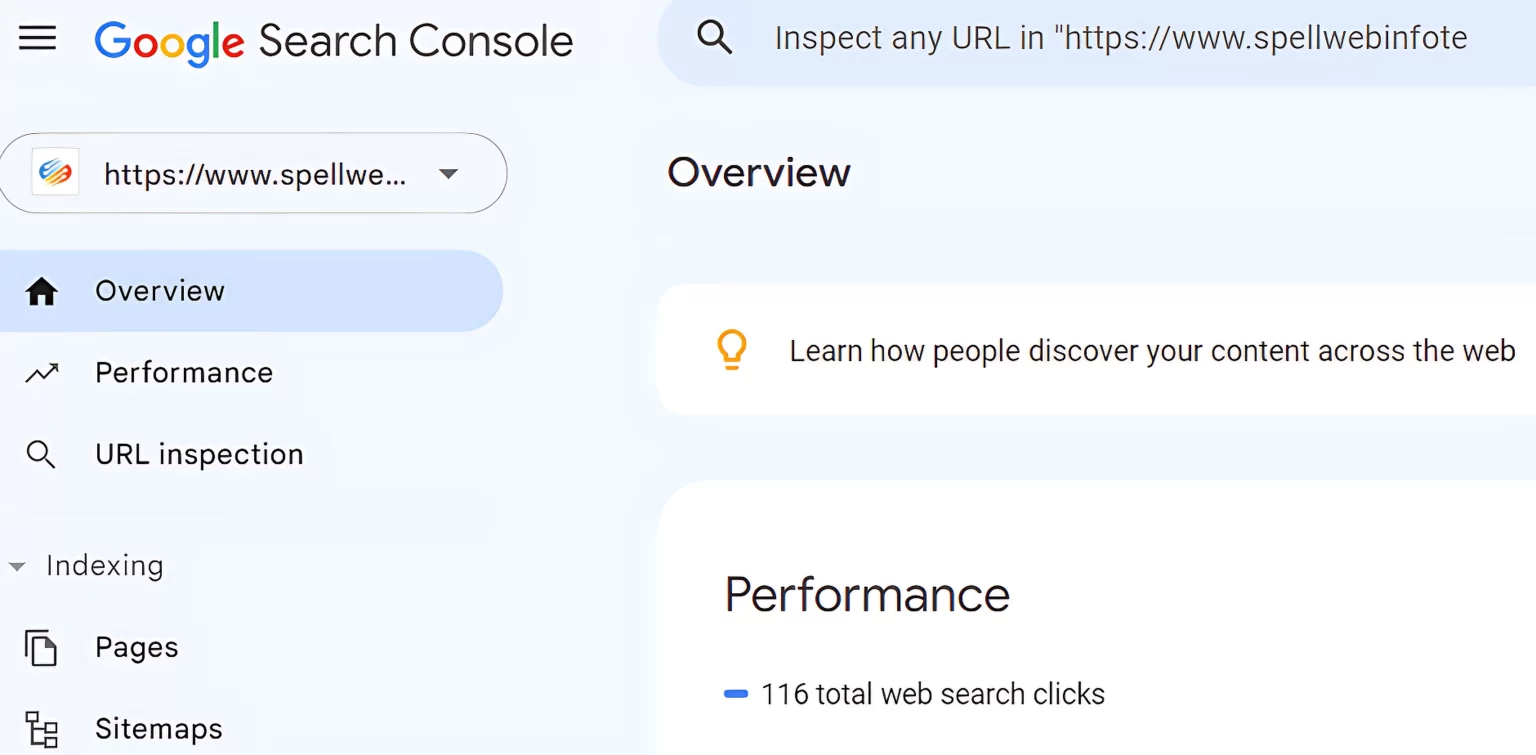
Otherwise, locate the “Sitemaps” option in the left-hand menu and click on it.
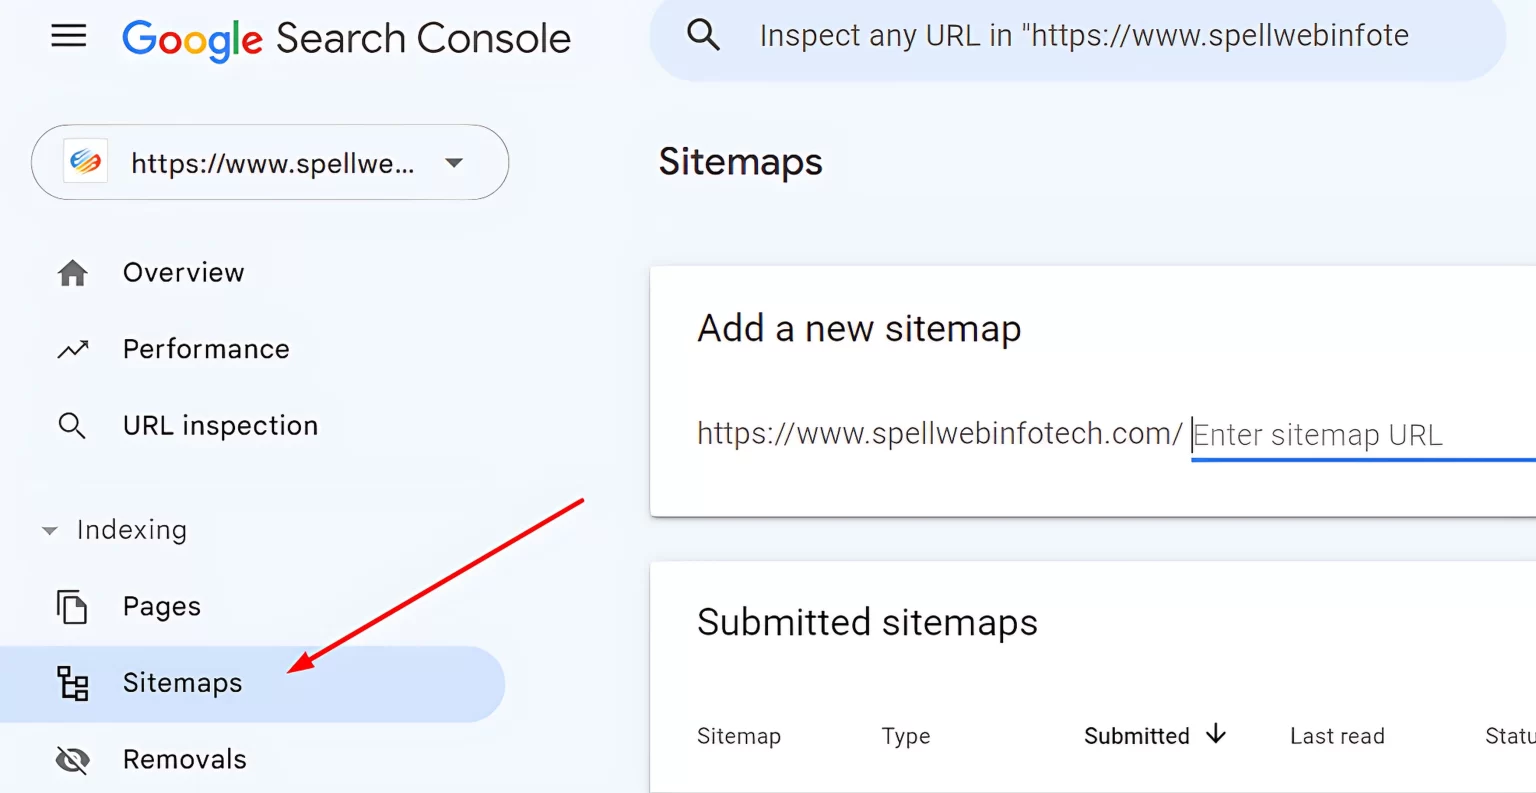
You will see two sections; “Add a new sitemap” and “Submitted sitemaps.”
This section will let you manage your sitemaps.
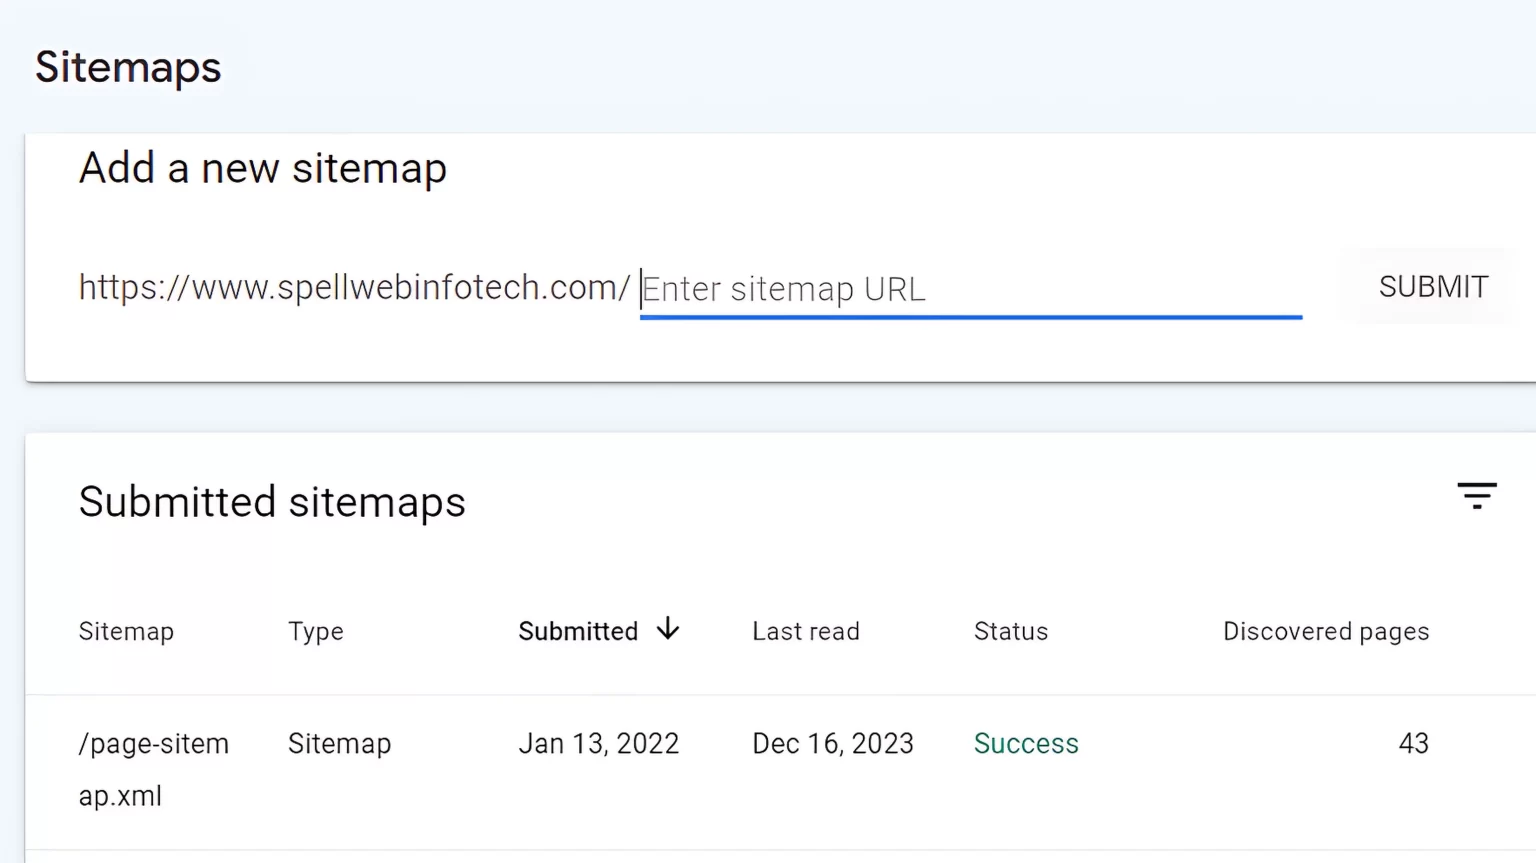
Go with the “Add a new sitemap” option to submit a new sitemap to Google.
Step 3: Find Sitemap’s URL.
Considering the SEO purpose, find your XML sitemap. Choose any of the following ways to find the sitemap’s URL:
- Opt for the most common placement at https://www.spellwebinfotech.com/sitemap_index.xml.
- Use a search operator to find the location of your sitemap. For instance, search site:yourdomain.com filetype: XML.
- Check the robots.txt file at https://www.spellwebinfotech.com/robots.txt) as it may also have your sitemaps URL.
Step 4: Add the link to “Add a new sitemap.”
After getting the Sitemap URL, add it to “Add a new sitemap” section and click the “Submit” button.

After your sitemap has been successfully submitted, you will get the confirmation message dialog box.
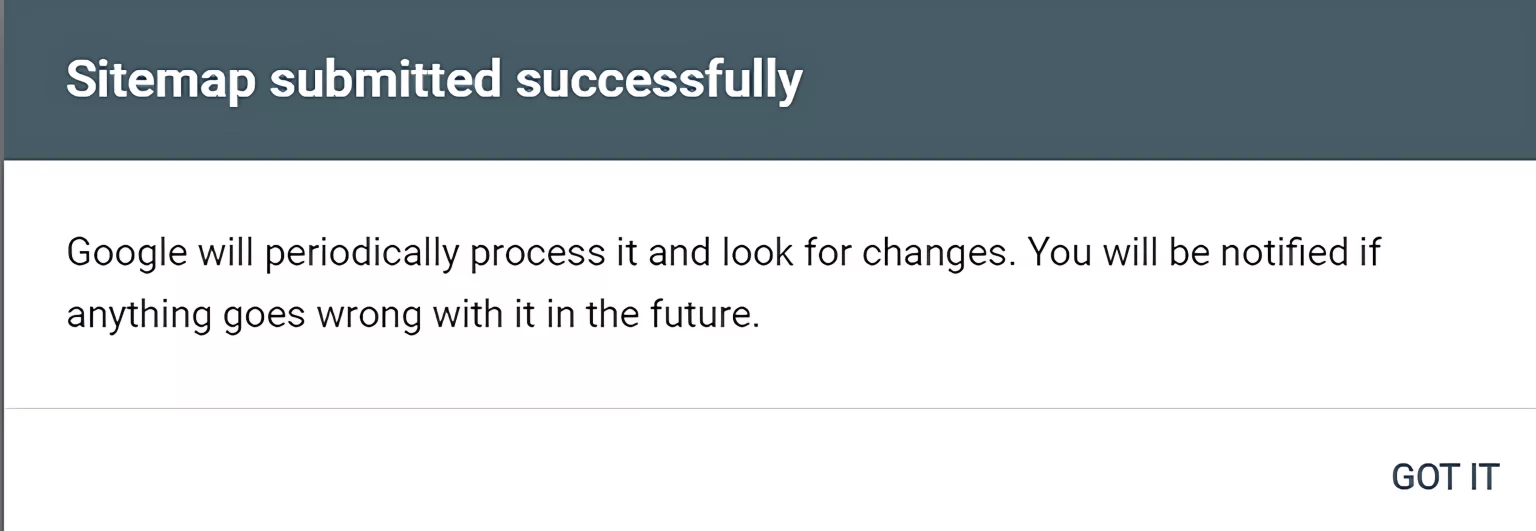
Click “Got It” and close the window.
Cross-check the recently submitted sitemap in the “Submitted sitemaps” section.
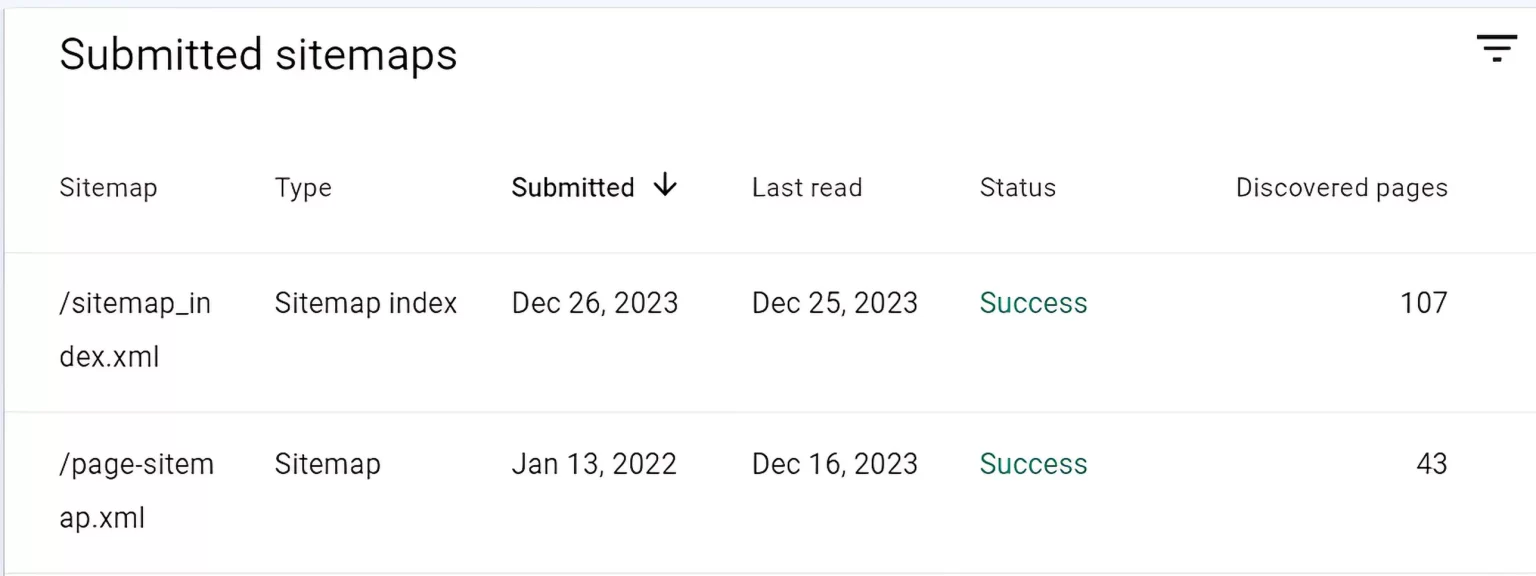
The “Status” shows “success,” meaning that your sitemap is submitted without issues.
However, if the “Status” shows “Couldn’t fetch” or “Has errors,” fix it using the site audit tools.
Conclusion-
Remember that it may take time for Google to crawl and index all the listed pages after submitting your sitemap.
The actual time may vary depending on your website’s size and Google’s crawling priorities.
However, submitting a sitemap increases the likelihood of your website being indexed more efficiently and accurately.
FAQ-
1. How do I get Google to read my sitemap?
When sitemaps have URLs blocked by robots.
txt file, google cannot access such sitemaps or their content.
So, to get Google to read your sitemap, check which files are blocked using URL Inspection tools and make changes in your robots. txt file.
2. When should I submit a sitemap to Google?
You only need to submit your sitemap to the search console once for each search engine.
After that, the search engine will automatically check your sitemap regularly, using a schedule they determine based on your website.
To ensure the search engine finds your sitemap, reference it in your robots.txt file.
3. How long does Google take to index a sitemap?
The time it takes for Google to index a sitemap can vary depending on various factors, such as the size of your website, the frequency of updates, the quality of your content, and the overall crawlability of your site.
Generally, it indexes websites with below 500 pages in 3 to 4 weeks, websites with 500 to 25,000 pages in 2 to 3 months, and websites with over 25,000 pages in 4 to 12 months.
4. Which sitemap is best for SEO?
XML sitemaps are the most commonly used and recommended format for SEO.
XML sitemaps are easily readable by search engines, providing a structured outline of your website’s pages and their relationships.
XML sitemaps help search engines understand your site’s structure and index it more effectively by including important metadata and indicating the priority and frequency of page updates.
